 Hooking up fan wires will vary depending on the wiring you have. To use a switch for both the light and the fan you will need wiring that has an extra wire in it. This would be 14-3 or 12-3 Wire.
Power from the box would be attached to each switch and then the black and red wires would be attached to the other side of each switch. This gives you the ability operate the light and fan separately.
For a fan that was not wired this way originally you may be stuck using the pull chains to control the lights and fan. You will still need to use the pull chain to change the speed on the fan no matter what you do.
Installing new wire for wiring a ceiling fan is a difficult problematic project. You would have to run a three conductor cable from the switch to the fan. This may be possible if you have an attic above the fan. You would still need to fish the wire down through the wall into the switch. This article is not intended to address this type of upgrade.
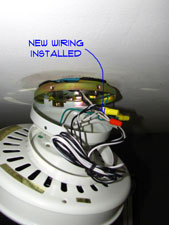
The course of wisdom would be to just use a pull chain. Not that hard really. Do you have the red and black conductors? Yes, follow the wiring diagram for the fan and hook one lead to each conductor. Hook up the white wire and ground wire as indicated. Tuck the wires up into the box and you are done wiring a ceiling fan. Well your not really done, but the wires are hooked up.
Only one conductor? You will hook both leads up to the single conductor. Again follow the wiring diagram provided. The black wire will provide power to both the light and the fan and you will use the pull chains to adjust.
Mount the motor unit to the base plate, following the instructions provided. Install the blades and lights as indicated. Some fans will have an additional electrical connection to make for the lights. Sometimes it is just a plug in. Use the instructions and the wiring diagram to complete. Add light bulbs and presto, you should have a working ceiling fan.