Search
Patching
Water Damaged Ceiling Texture
Fixing water damaged ceiling texture is another common requirement. When the texture loosens from moisture you will need to replace it. Make sure that the underlying drywall is still in good condition. Prepare for a little mess.
Get a drop cloth and a garbage bag. With a scraper remove the loose texture. Texture that is tight should not scrape off easily.
One exception to that. Acoustic texture, the kind with the little balls will come of easily with a scraper even if it is not damaged. Once you have the bad material removed you can think about repairing the texture.
For a discussion on drywall texture repair, go to the article 'How to Texture Drywall'. This article will direct you in how to identify and repair various textures you may have in your home.
Replacing Water Damaged Drywall
In some cases, replacing water damaged drywall is the only option. You have examined the damaged area and it is clear that you need more than paint. It is best to remove the compromised drywall and replace it with new drywall.
See the article 'Water Stains on Drywall' for information on sealing a stain without removing the drywall.
Examining the Damaged Drywall
You need to determine how much drywall needs to be removed. Too much water will deteriorate the paper facing and weake the core of drywall. When this happens, the old drywall needs to be removed and new drywall installed.
Is the drywall mushy and the paper easily torn? Is the paper separating from the surface of the gypsum? Has it sagged and pulled away from the framing members? Are the fasteners rusty and popped through the paper? Is there mold on the drywall?
A yes answer to one or more of the questions in the previous paragraph will mean that the drywall needs to be replaced.
If the water stain appears to be only on the surface of the drywall and it has dried completely, you may be able to seal it and re-paint.
Fixing the Leak
There is no point in repairing the drywall if you have not stopped the leak that is damaging the drywall. Water intrusion that ruins drywall can come from a number of sources. A leaking roof is certainly a candidate. Plumbing leaks are also common culprits.
See the articles 'Troubleshooting Plumbing Problems' and 'Fixing Leaking Pipes' for information and instructions on what to do to get rid of the water issue.
Removing the Bad Drywall
Drywall is fastened to the wood framing with either screws or nails and sometimes glue. To remove it, you need to locate the framing members. If you don't you will have to add additional supports to fasten the drywall to.
Locating Framing Members
Once you have determined how much drywall needs to be removed, you want to lay this out on the wall surface. The make the installation of the new drywall simpler, you want to use a straight edge to mark out the area to be cut out. Ideally, it will be a square or a rectangle. You can use a stud finder to locate the stud framing.
Try to lay out the cut out area so that the edges that are paralell to the stud framing are centered on thed studs. It is harder to cut out the drywall at these locations, but is saves having to install extra framing members.
Cutting Perpendicular to the Studs
You can use a key hold saw to cut out the drywall that is perpendicular to the stud framing. You will have to stop at each stud or joist and skip over it. You should be able to get the majority of the cut done with the keyhold saw. You will need to finish off the cut over the framing with a utility knife.
Cutting Drywall Paralell With the Framing
You will need to use a utility knife to cut the drywall over the framing members. Ideally, you have located the center of the framing and drawn a line down the center. Initially, you will score this line with a utility knife. After you have scored the paper, you will run the utility knife over the cut repeatedly, applying more pressure each time until you cut completely through the drywall.
Replacing the Damaged Drywall
Installing new drywall involves cutting the sheets to the correct size and then fastening it in place. There are various measurements that need to be taken and laid out on the drywall panel. After that, the drywall needs to be cut correctly. Once the sheet is cut, it can be installed at the patch.
The article 'How To Cut Drywall' has instructions on all of the steps associated with installing new drywall patches.
Finishing the New Drywall Patch
After you have installed the new drywall where you tore out the old damaged drywall, you will need to tape and finish it. This situation is similar to any other drywall repair project, you have at most five steps to complete the finishing. (1) Applying the drywall tape. (2) Installing a first coat of drywall compound. (3) After a light sanding, you will apply a second coat of compound. (4) After another light sanding, you will want to skim the drywall with a light coat of mud to smooth out the surface. (5) The last step is to sand the drywall to prepare it for a coat of paint.
For a complete discussion on the steps involved with a drywall finishing project, see the article, 'Taping and Mudding Drywall'
Water Stains on Drywall
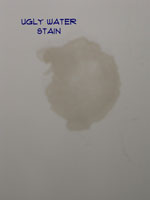
 Water stains on drywall when they are on a wall or ceiling can be pretty unsightly. Finding a plant to put in front of it may work for awhile. Not much you can do to mask a water stain on your ceiling.
Not sure if this is your problem? See the articles 'How To Fix Drywall' and 'Patching and Repairing Drywall' for more information and a complete listing of all the drywall topics.
As long as the drywall is still in good shape and the water leak has been stopped you can just repaint the area. You need to seal the stain with a good quality stain blocker such as Kilz or Zinsser. Once the stain blocker has dried you can paint the area with normal paint.
See how easy it is to repair water damaged drywall when it is just a water stain. Painting can take care of the problem. Just use the right paint. Time to move on to your next project. Can't find your to do list, well how about taking it easy in front of the television.
Stains are a common problem in any home. This website only touches on them occasionally. Do you have other stains you need to deal with? We found a great website that has a lot of good information on stains. Follow this link Stain Guide, for some helpful tips.
Water Damaged Drywall
 Something has leaked and now you need to repair water damaged drywall. What went wrong? Did the toilet overflow? Is your roof leaking? Before you worry about the drywall, you need to figure out what happened and fix that problem.
Not sure if this is your problem? See the articles 'How To Patch Drywall' and 'Drywall Repair' for a listing of related topics along with solutions for problems.
Locating Leaks
Work backwards from the leak. What is above it? Remember that water runs down hill, so the damaged drywall is below the problem. Do you have a bathroom above the spot. You have a lot of water that runs through a bathroom. Is something clogged? Is something leaking?
Once you have dealt with the leak you can attend to your drywall problem. To repair water damaged drywall may not be that hard. Sometimes it is just a stain. Don't make the mistake of thinking that a coat of paint will solve it. Actually, paint may solve the problem, but it needs to be the right kind of paint. Drywall that has been exposed to repeated or severe water intrusion will most likely need to be replaced. Are you a strong person? You can deal with this. It's only drywall, how hard could it be?
Water Damaged Drywall - Information
What Can You Save?
A contractor will charge you for the amount of work involved to repair water damaged drywall. Best case you could have someone fix it in a single visit, around $50 to $75. Multiple visits will cost more spending $200 to $300 would not be unheard of. Could be more, drywall is considered a labor intensive trade.
How Hard Could It Be?
To repair water damaged drywall may require replacing drywall and taping. Both of these activities require some work. Hopefully, you will only have to paint with the right kind of paint.
Check the Simple Things!
Where the drywall is still solid and dry. It is possible that you just need to repaint the stain with a good quality stain blocking paint. Don't use regular paint, water stains will bleed through.
What Can Go Wrong?
To repair water damaged drywall you may run into mold. Take precautions before you attempt to remove moldy drywall. Check out this government website before you mess with mold. A Brief Guide to Mold, Moisture, and Your Home, it will give you some insight and safety tips. Another good article is Mold, on the CDC website. Drywall patches that are poorly done can look just as bad as the problem you started with. Drywall is also messy, the white dust and drywall compound has an amazing ability to get everywhere. Use drop cloths and plastic to contain the damage path.
Repair Water Damaged Drywall – The Steps Involved
Drywall is a layer of gypsum sandwiched between two sheets of paper. Too much water can cause the core of the drywall to break down and the paper to separate from the core. Remember that there is no point in fixing the drywall until you have repaired the water leak.
Fixing 'Water Stains on Drywall' explains what to do when a leak stains the dryall. You will learn whether or not it is possible to paint over the spot.
When the paper and core of the drywall become compromised, you are left with no other choice besides replacement. The article 'Replacing Water Damaged Drywall' gives you pointers and led you to the right information.
When the water damage occurs on a ceiling you may have texture involved. Fixing 'Water Damaged Ceiling Texture' is covered in this article.
Summary
Remember the steps? Follow them in order. Fix the leak first and then repair the water damaged drywall. You could have a fairly simple problem or you could have a bigger job to do. This depends on the severity of the water damage and how quickly it was fixed. We hope this project was not too difficult and that is was successful. Move on to other projects, or just get some rest.
Spackle Dry Time
Why does the spackle dry time matter? The main reason is that you can't paint until the spackling is dry and sanded. You will likely need more than one application of spackling, so the drying time becomes more of an issue.
Got a drywall repair you are working on? See the articles 'How To Spackle a Wall' and 'How To Patch Drywall' for complete instructions on what to do.
Factors That Affect Spackle Dry Time
How quickly spackle dries is affected by multiple factors. One is the compound itself. Different spackling pastes and drywall compounds dry at different rates. The 'Fast Dry' of 'Fast Setting' types have chemicals added that allow them to dry quickly.
The Second issue is the size and depth of the hole or ding that is being filled. The bigger and deeper the patch, the longer it will take to dry. In fact, large deep patches that have a lot of compound in them may take days to dry under certain conditions. This type of patching is way beyond the limitations of spackling.
A third factor is the humidity that is in the air. The more humid it is, the longer it will take for the spackling to dry. Spackling paste or compound is mixed with water, the water needs to evaporate for the spackling to dry, simple right?
Fast Drying Spackling
What is fast drying spackling? There are two types of spackling that will dry faster than thier normal dry cousins. Both types use chemical reactions to improve the drying time.
The first type is a dry powder that is a 'knock off' of the quick setting drywall compounds noted below. This type is sold in a powder form and needs to be mixed with water before it is applied. It is the water that causes the chemical reactions that helps the drying time. Once it is mixed the reaction starts and you have a limited working time before it hardens completely.
These products are an excellent choice for patches. They tend to dry harder and faster than most other products. However, the tradeoff is that they are a little harder to work with, requiring mixing and immediate clean up.
The second type is a ready mixed spackling that starts the drying process once it is exposed to air. These types may other additives that might affect the overall finish. This type of spackling does not dry as quickly as a dry mixed setting type compound. The other drawback can be the use of materials such as vinyl that are somewhat foriegn to gypsum products or drywall. Spackling that has a 'vinyl' composition or other plastic type chemicals may not blend with the existing surface as well as traditional gypsum based products.
Spackling That Changes Color
This is not intended to be a plug for a particular product, but it is pretty cool. Dap has a product called DryDex Spackling, and it changes color as it dries. This can be helpful if you are unsure of how to tell when the spackling is dry.
When it is applied, it is pink in color. As it dries the pink begins to fade and it turns white. It is something of a gimmick, but still it takes the mystery out of drying.
The truth be known, most spackling and drywall compounds have the same ability that is naturally built into the material. Wet gypsum products are a varying shade of gray. The wetter the compound is, the darker gray it will appear. As it dries, the gray color will become lighter and lighter until it is a flat white color.
For professionals, or those used to working with drywall compound, the color thing is not that significant. For a novice that is not used to working with drywall compounds, the 'pink' color my take the mystery out of the drying process. Of course, you will have to pay extra to get the pink technology.
Fast Setting Drywall Compound
Setting type drywall compounds have chemicals in them that help them to dry. Using this type of product will dramatically reduce the amount of time it takes for the compound to dry.
This type of material comes in a powder form and has to be mixed. When water is added to the powder it starts the chemical reaction the dries the material out. The drying time can be further accelerated by using warm water.
Do not mix large batches of this type of compound. It will turn rock hard in the container once the chemical process as reached climax. It is also a good idea to clean tools and containers as soon as your done. The material can dry hard and be difficult to clean later.
Helping Spackling to Dry
If you are in a hurry or it seems like the spackle is taking forever to dry, you may want to help it out. Spackling and drywall compound are made of gypsum, mixed with water. Humidity and air movement will affect how quickly the compound will dry. The following are some tips for getting the spackling to dry faster.
Air Conditioning - When it is humid outside it will be humid on the inside unless you are running your air conditioning. Air conditioners remove moisture from the air. Dryer air will help the wet spacklng dry faster.
Portable Fans - Circulating the air around the patches will also help them to dry. The moving air will help the moisture to dissipate allowing for more evaporation. Run a fan in the room you are working on as close to the patches as possible.
Hair Dryers - Do you have one spot or a couple of spots that are deep and won't dry? A hair dryer is the big artillary when it comes to getting spackling to dry. The hot air will dry the material faster than anything else. The drawback is that you have to stand there with the hair dryer blowing on the patch until the problem is solved.
Temperature - If you have the heat turned down while you are working on the area, you may want to consider turning it back up. Cool walls and air are not condusive to rapid drying of spackling.
Got a drywall repair you are working on? See the articles 'How To Spackle a Wall' and 'How To Patch Drywall' for complete instructions on what to do.