Search
Drywall
Fixing Holes in Plaster Walls
So can you use drywall tape and compound to make larger plaster wall repairs? Yes you can although some caution is required. Whether it is plaster or drywall, the main purpose is for it to hold up the paint. A smooth plaster surface or a smooth drywall surface will both to the job. Drywall compound will stick to plaster and drywall tape will bridge gaps and smaller holes. The moral to this story is that drywall materials will work for plaster repairs as long as they are not too severe.
Using drywall mud and tape does require some skill and practice. See the articles 'How To Patch Drywall' and 'Taping and Mudding Drywall' for pointers and information on using drywall materials to repair walls and ceilings.
Drywall materials are easier to obtain, they are readily available at home supply stores. Plaster materials are more difficult to obtain. You have to go drywall or masonry suppliers to obtain them. You also need a lot more practice to master these skills. Where possible, the course of wisdom is to try and use drywall products for plaster wall repairs.
Spackling Plaster Walls
Spackling plaster walls is done the same way as you would for drywall. The easiest way to patch small holes and and cracks is to use spackling or drywall compound. Plaster and drywall are both gypsum based, so the two materials will adhere to one another.
Fill the holes and lightly sand them as needed until you have a smooth surface. You may need to coat them two or three times, depending on the size of the hole.
For additional information, you can see the article 'How To Spackle Drywall'. This article has information on the material to use and how to install it.
The main difference between plaster and drywall is that, drywall has a paper facing on it. Plaster walls are generally three different types of plaster, that are build up to achieve the surface. When your holes or damage get deeper into the plaster you may have to do some extra work. See the article 'Fixing Holes in Plaster Walls', for more information.
Plaster Wall Repairs
 Making plaster wall repairs can be a little different than repairing drywall, why? For one thing plaster is installed differently than drywall. Drywall comes in sheets, two pieces of paper with a gypsum core in the middle. Only the seams receive drywall compound to finish it off.
Plaster and drywall are sometimes used interchangeably, not sure if you have a plaster wall? See the article 'How To Patch Walls and Ceilings' and 'Drywall Repair Problems' for a listing of all the topics.
An old style plaster wall is installed with three coats of troweled material over a substrate. Plaster requires a lot more skill than drywall, not to mention a lot more work. When the plaster dries the coats bond together into one monolithic wall or ceiling. How difficult it is to repair plaster is determined by how stable the plaster is now.
Small repairs can be done with drywall compound and drywall tape. It is even possible to use pieces of drywall to make larger repairs. Plaster is a gypsum based product, the same as drywall, so the two materials are compatible.
Plaster Wall Repairs - Information
What Can You Save?
There is a wide range of cost for this type of repair. The minimum would be around $100 with several hundred or even thousands possible. Drywall and plaster repairs often require, multiple steps, thus increasing the cost.
How Hard Could It Be?
Plaster wall repairs involve both work and skill. With a little practice, the skill can be acquired. You will not be able to get around the work.
Check the Simple Things!
You can fix minor cracks and holes with spackling. You can purchase a small can at a home supply store. See the article 'How To Spackle Drywall' for instructions on this easy repair. The article 'How To Repair Drywall', provides a general discussion on wall and ceiling repair topics.
What Can Go Wrong?
Plaster wall repairs and their cousins, drywall patching, can be a messy job. Drywall or plaster dust is very fine and gets everywhere. Take precautions and protect the area. Using some plastic to close off the area is a good idea. Getting a good finish on the repair will take some practice. You may have to put an extra coat or two on, with some sanding in between. See the article 'Taping and Mudding Drywall' for some pointers on working with drywall compound.
Troubleshooting Plaster Wall Problems
Fixing small holes and dings in plaster walls is the same as a drywall wall. 'Spackling Plaster Walls' covers this topic.
When you have a bigger hole in your wall it is more of a problem. The article 'Fixing Holes in Plaster Walls' covered what can be done and how to fix it.
Plaster products are less common than drywall. They are also harder to use. Since plaster and drywall are made from the same materials, can they be mixed? The article 'Using Drywall on Plaster Walls' covered how to do this.
Plaster is similar to drywall, since it is made from the same products. However, the way it is installed is completely different. Human error is also a factor with plaster. Over time plaster can fail and start to fall off the wall. The article 'Plaster Wall Failure' discussed what can be done when this happens.
Summary
Do you have plaster walls in your home? At first you may be intimidated with the thought of trying to repair them. There is no need for fear. Plaster and drywall are very similar. In fact plaster was the predecessor of drywall and in many ways if very similar.
Hopefully, you were able to obtain some the materials at a home supply store that worked on your problem. Once it is sanded, a smooth drywall surface can look as good as a plaster wall. Now that this project is complete, you can move on to other home repairs.
Spackle Dry Time
Why does the spackle dry time matter? The main reason is that you can't paint until the spackling is dry and sanded. You will likely need more than one application of spackling, so the drying time becomes more of an issue.
Got a drywall repair you are working on? See the articles 'How To Spackle a Wall' and 'How To Patch Drywall' for complete instructions on what to do.
Factors That Affect Spackle Dry Time
How quickly spackle dries is affected by multiple factors. One is the compound itself. Different spackling pastes and drywall compounds dry at different rates. The 'Fast Dry' of 'Fast Setting' types have chemicals added that allow them to dry quickly.
The Second issue is the size and depth of the hole or ding that is being filled. The bigger and deeper the patch, the longer it will take to dry. In fact, large deep patches that have a lot of compound in them may take days to dry under certain conditions. This type of patching is way beyond the limitations of spackling.
A third factor is the humidity that is in the air. The more humid it is, the longer it will take for the spackling to dry. Spackling paste or compound is mixed with water, the water needs to evaporate for the spackling to dry, simple right?
Fast Drying Spackling
What is fast drying spackling? There are two types of spackling that will dry faster than thier normal dry cousins. Both types use chemical reactions to improve the drying time.
The first type is a dry powder that is a 'knock off' of the quick setting drywall compounds noted below. This type is sold in a powder form and needs to be mixed with water before it is applied. It is the water that causes the chemical reactions that helps the drying time. Once it is mixed the reaction starts and you have a limited working time before it hardens completely.
These products are an excellent choice for patches. They tend to dry harder and faster than most other products. However, the tradeoff is that they are a little harder to work with, requiring mixing and immediate clean up.
The second type is a ready mixed spackling that starts the drying process once it is exposed to air. These types may other additives that might affect the overall finish. This type of spackling does not dry as quickly as a dry mixed setting type compound. The other drawback can be the use of materials such as vinyl that are somewhat foriegn to gypsum products or drywall. Spackling that has a 'vinyl' composition or other plastic type chemicals may not blend with the existing surface as well as traditional gypsum based products.
Spackling That Changes Color
This is not intended to be a plug for a particular product, but it is pretty cool. Dap has a product called DryDex Spackling, and it changes color as it dries. This can be helpful if you are unsure of how to tell when the spackling is dry.
When it is applied, it is pink in color. As it dries the pink begins to fade and it turns white. It is something of a gimmick, but still it takes the mystery out of drying.
The truth be known, most spackling and drywall compounds have the same ability that is naturally built into the material. Wet gypsum products are a varying shade of gray. The wetter the compound is, the darker gray it will appear. As it dries, the gray color will become lighter and lighter until it is a flat white color.
For professionals, or those used to working with drywall compound, the color thing is not that significant. For a novice that is not used to working with drywall compounds, the 'pink' color my take the mystery out of the drying process. Of course, you will have to pay extra to get the pink technology.
Fast Setting Drywall Compound
Setting type drywall compounds have chemicals in them that help them to dry. Using this type of product will dramatically reduce the amount of time it takes for the compound to dry.
This type of material comes in a powder form and has to be mixed. When water is added to the powder it starts the chemical reaction the dries the material out. The drying time can be further accelerated by using warm water.
Do not mix large batches of this type of compound. It will turn rock hard in the container once the chemical process as reached climax. It is also a good idea to clean tools and containers as soon as your done. The material can dry hard and be difficult to clean later.
Helping Spackling to Dry
If you are in a hurry or it seems like the spackle is taking forever to dry, you may want to help it out. Spackling and drywall compound are made of gypsum, mixed with water. Humidity and air movement will affect how quickly the compound will dry. The following are some tips for getting the spackling to dry faster.
Air Conditioning - When it is humid outside it will be humid on the inside unless you are running your air conditioning. Air conditioners remove moisture from the air. Dryer air will help the wet spacklng dry faster.
Portable Fans - Circulating the air around the patches will also help them to dry. The moving air will help the moisture to dissipate allowing for more evaporation. Run a fan in the room you are working on as close to the patches as possible.
Hair Dryers - Do you have one spot or a couple of spots that are deep and won't dry? A hair dryer is the big artillary when it comes to getting spackling to dry. The hot air will dry the material faster than anything else. The drawback is that you have to stand there with the hair dryer blowing on the patch until the problem is solved.
Temperature - If you have the heat turned down while you are working on the area, you may want to consider turning it back up. Cool walls and air are not condusive to rapid drying of spackling.
Got a drywall repair you are working on? See the articles 'How To Spackle a Wall' and 'How To Patch Drywall' for complete instructions on what to do.
Sanding Spackle
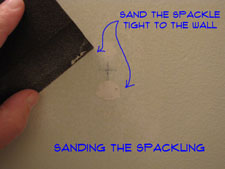 Sanding spackle needs to be done when the spackling compound has dried completely. You should also sand lightly between coats. Sanding does not take very long, usually only a couple of minutes.
When the spackling paste is dry you can lightly sand it with a sanding sponge or sandpaper. Sand it flat with the wall surface around it.
For related information you want to see the articles on "How To Use Spackling', 'How To Repair Drywall' and 'Patching Drywall'.
Sanding Materials
Sanding Sponges
Sanding sponges are a convenient way to do light sanding especially on drwall and drywall products like spackling. They are made of synthetic material and have a grit formed into the surface. They come in a variety of sizes, with most of them fitting into the palm of your hand.
The other nice feature is that the sponge is formed into the shape of a block, so the surface of the sanding area stays flat. Sanding sponges are sold at the same place that you buy your paint and spackling.
Sand Paper
You can use standard sandpaper to sand spackling, although there are some cautions. The first would be the grit. If the grit is too coarse it will leave scratches on the spackling patch and the surface around it. The scratches can show through the paint and mar the appearance of your wall. If the sandpaper is too fine, you will work a lot harder to get the surface smooth. In fact you may not get the spackling flush with the surface around it.
For sanding drywall or spackling patches, you want to stay with a grit between 100 - 150. This grit range is fairly common and you may already have some sandpaper that matches.
The other concern with sand paper is grooving the surface. When you press down on the sandpaper with your fingers you create pressure points that will sand more away in some spots than others. This can leave you with depressions or grooves on the surface of your wall.
If you are going to use sandpaper it is a good idea to use a sanding block. The block or holder will keep the sanpaper flat against the surface of the wall or ceiling.
Sanding Screen
Sanding screen is typically used for sanding new drywall before it is painted. You can used it to sand patches and spackling. It is designed to fit on a drywall pole sander. This is a special type of sanding block that has a swivel head on it.
The grit range for sanding screen is 80 - 220. Use screen that is in the 100 - 150 range for sanding finished walls that have been repaired.
Sanding Blocks
Sanding blocks come in all shapes and sizes. There are some special ones that are designed specifically for drywall sadning. They take a special precut sheet of sandpaper or sanding screen. For small spackling repairs you probably do not need something this big.
A typical hand sanding block will accept a quarter sheet of sandpaper. These will do fine for sanding small spots where repairs have been made.
Orbital and Electric Sanders
It is not a good idea to use a power sander to sand spackling. You will likely do more harm than good. Spackling paste and putty is a fairly soft material and so is the wall surface around the patch. The power sander can easily dig in too deep and thus ruin the patch, requiring further repair.
Proper Sanding Technique
The main thing to keep in mind when you are sanding walls and ceilings is that you want a flat, smooth surface. Light will catch both indentations and protrusions, however slight they might be. When you patch the wall, you want the patch to be flush with the surface around it, not indented, not raised up, flush.
Try not to rough up the surronding area too much. Cutting grooves or scraching up the surface may show when you apply the paint. Remember, your walls are likely made of drywall. Drywall is a gypsum core sandwiched between two sheets of paper. Scuffing up the paper and raising the paper fibers is not desirable. If this happens, you will have to apply more drywall compound to tighten up the paper fibers.
Lightly sand the spackling with a flat sanding block or sponge. Ideally, at first, you will only sand the build up of spackling. When you get the spackling down close to the surface you want to go lightly, until the patch is blended into the area around it.
Run your fingers over the surface to check for any bumbs or depressions. If you feel raised spots, continue to sand them until they are flat. For indentations, you will need to apply more drywall compound or spackling and let it dry.
Wet Sanding
A slight variation to the above would be if you are trying not to create any dust. Wet sanding can allow you to smooth out the patches and repairs without making a mess. The use of the word 'sanding' is something of a deception. You don't really 'sand' the surface, instead, you dissolve the compound and smooth it out.
The same principles apply to wet sanding that apply to dry sanding. You want to keep the surface flat and blend the patch into the adjacent surface. To do this you use a damp rag wrapped around a sanding block or a sanding sponge. Another alternative would be stiff flat sponge.
You will need to rinse the rag or sponge out often, since you are dissolving the compound with it. Use clean water to do this, rinse the rag or sponge until the water is clear.
Dealing With the Spackling Dust
Dust in another thing to consider when you are using spackling paste or any other type of drywall compound. Sanding these materials will create dust, fine white dust that has a tendency to get everywhere. If you are just doing a few small spots, it is probably not a big concern.
There are four possible options for dealing with the dust, they are listed below along with links to articles that offer more explanation.
For a complete discussion on sanding drywall and drywall patches, see the article 'How To Sand Drywall' for more information.